 Not being able to send mail using your outgoing mail server of choice is frustrating! Particularly when you consider that the problem is probably a result of your *ISP deciding what is best for you. Whether you are connecting from home, work, school, university, college or a WIFI hot spot at an airport or coffee shop, you are at the mercy of their firewall policies which may prevent you from establishing certain connections, such as to your outgoing mail server. They do this to try and prevent spamming from their networks, despite it being a rather antiquated method. No matter, there are several ways to get mail out and if at first you cannot connect, try one of these other options:
*Please note that in this article I have used the term 'ISP' in a very broad sense, referring to the entity that is providing your Internet connectivity at the time you would like to send your mail, not your personal or home Internet service provider in all cases.
1. Send mail through your *ISP's outgoing mail server on port 25 (default)
This is the simplest solution. Your ISP SMTP server details will be something like mail.isp.com or smtp.isp.com on the standard port 25. These settings should be readily available on your ISP's website or from tech support.
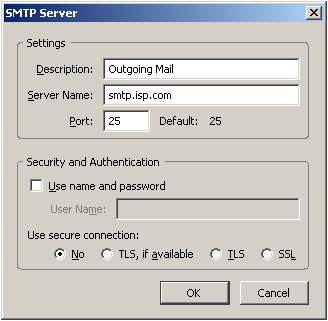 This solution may be perfect for your home desktop PC that is always connected to your ISP's local network, however you may find this sort of setup irritating when used on a laptop as your ISP may block incoming connections from outside networks on port 25. i.e. You may be able to send mail provided you are sending mail through your home connection, but then not be able to send mail from a coffee shop access point.
2. Send mail through a different port
If you cannot contact a mail server on port 25, then you can also try port 465 or port 587. A quick way to check if these ports are open on your connections' firewall is to use telnet from the command line. Select, 'Start', 'Run', and type 'cmd'. This will open a command line window. Now type 'telnet smtp.isp.com 465' where smtp.isp.com is your mail server and 465 is the port. Yahoo! accepts outgoing mail connections on port 465 (SSL) so we'll use it as an example.
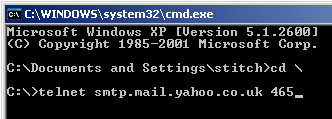 If the port is not being blocked by your providers firewall you should be presented with a blank screen and blinking cursor
 Alternatively, if the port is blocked or you make a spelling error (smtp.mail.yahoo.co.zz) in the server address you will receive the following error
 Gmail accepts outgoing mail connections on port 587 (TLS).
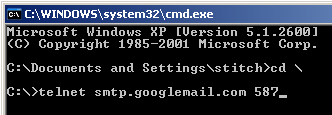 You should see feedback similar to the following if you telnet into the Gmail server successfully.
 Port 587 and 465 connections provide secure connections and you will need to authenticate if you want to send mail through one of these ports. i.e. You will require a valid account with a user name and password for the server you are using - Gmail, or Yahoo! mail etc...
But, a successful telnet connection indicates that you can alter your outgoing mail settings to send mail through the corresponding port.
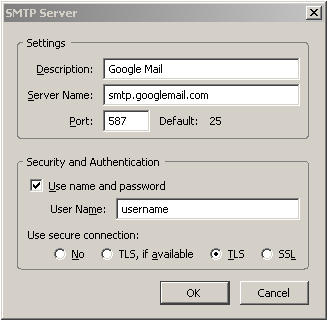 This is a nice solution as it should allow you to send mail from most networks and will save you having to change your mail settings or experience trouble every time you try and connect from a different network - a most handy configuration for mobile connectivity.
3. Send mail through a non-standard port (80 for example)
Port 80 is the port that browsers use to connect to websites, so it is a pretty sure thing this port will be open on most firewalls. This means that you should be able to send mail through port 80 under most circumstances - provided that you can actually find a mail server that accepts outgoing mail connections on port 80 of course. One example of such a mail server is Secure SMTP Server, which is unfortunately a paid service - as I am sure most outgoing mail servers with a port 80 configuration will be.
You may also find that your ISP is configured to accept outgoing mail on a non-standard port (other than 80,465 or 587). Port 2525 is sometimes used as a substitute, though this will be ISP specific and you should contact your ISP's technical support to find out.
4. Send mail using web based interfaces
By this point, you are running low on solutions and if the above options are not working for you then chances are that access to web based email sites like hotmail, Gmail and Yahoo! Mail will be blocked too.
Otherwise try to access your ISP's mail server from your browser - the address will look something like http://mail.isp.com or http://smtp.isp.com. There should be a 'log in to my account' link or something similar on your ISP's website, otherwise contact your ISP's technical support for help.


